Expert Guide to Broken Sash Cord Replacement: Restore Your Windows Safely and Efficiently
Windows are an integral part of any building’s aesthetic and functionality, providing natural light, ventilation, and aesthetic appeal. Among various types of windows, sash windows are renowned for their elegant movement and classic charm. However, like all mechanical components, sash windows rely on working cords to operate smoothly. When these cords break or wear out, they can render your sash window unusable, compromising security, energy efficiency, and the overall integrity of your home. For homeowners and property managers in the UK seeking a reliable and cost-effective solution, understanding the intricacies of Broken sash cord replacement is essential. This comprehensive guide delves into everything you need to know—from identifying signs of failure to executing repairs either DIY or through professional services—so you can restore your sash windows confidently and efficiently.
Understanding Sash Cord Replacement: When and Why
Signs Your Sash Cord is Broken or Worn
Sash cords play a vital role in enabling the smooth opening and closing of sash windows. Over time, these cords are subjected to constant tension, friction, and environmental exposure, which can cause them to fray, weaken, or snap altogether. Recognizing early symptoms of sash cord failure is critical to maintaining your window’s operation and preventing further damage.
- Difficulty Operating the Window: If you find it hard to lift or lower the sash, or if it hangs unevenly, the cords may be compromised.
- Unusual Noises: Rattling, squeaking, or grinding sounds when moving the sash indicate possible cord deterioration or dislodgement.
- Stuck or Jammed Window: An immovable sash often results from broken cords, especially when the weight isn’t counterbalanced properly.
- Visible Damage: Frayed, loose, or snapped cords may be visible during inspection, especially when the sash is raised or lowered.
Perform a visual inspection by carefully opening the window and examining the cords near the pulleys. If you notice any of the above signs, it’s time to consider replacing the broken sash cord to restore functionality.
Risks of Delaying Replacement
Ignoring worn or broken sash cords can lead to several issues that escalate over time:
- Structural Damage: A misaligned or hung window can cause stress on the frame, leading to wood rot or deformation.
- Security Vulnerability: Sash windows stuck in open or ajar positions can compromise your home’s security, inviting intruders.
- Energy Inefficiency: Gaps caused by malfunctioning sashes can lead to drafts, increasing heating or cooling costs.
- Increased Repair Costs: Minor issues, if neglected, often result in more costly repairs—sometimes necessitating complete sash replacement or frame repair.
Timely replacement of broken sash cords not only preserves your windows’ operational integrity but also prevents these potential damages, saving you money and stress in the long run.
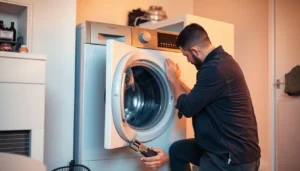
Advantages of Professional vs. DIY Replacement
While DIY sash cord replacement can appear straightforward, it involves specific skills, tools, and safety considerations that may not be suitable for all homeowners. Here’s a comparison of benefits and challenges:
DIY Replacement
- Cost Savings: Materials and tools might cost as little as £10–£50.
- Learning Opportunity: Enhances your handyman skills and confidence.
- Flexibility: Immediate repair without waiting for appointments.
However, potential pitfalls include improper measurements, damage to the window sash, or safety risks when handling tools or working at height. Many online tutorials, such as those on repair guides, can assist with step-by-step instructions.
Professional Replacement
- Expertise and Precision: Experienced technicians ensure correct measurement, installation, and safety standards.
- Time and Convenience: Professionals often complete work faster and with minimal disruption.
- Warranty and Guarantee: Reliable service providers offer assurances on their work, providing peace of mind.
- Additional Repairs: Professionals can identify and address related issues, such as frame rot or sash damage.
The typical cost for professional sash cord replacement in the UK ranges from £70 to £150 depending on window type and scope, according to Checkatrade.
Step-by-Step Process for Broken Sash Cord Replacement
Preparing Your Tools and Materials
Before undertaking sash cord replacement, gather the necessary tools and materials:
- Tools: Screwdrivers, small chisel, mallet, pliers, scissors, tape measure, gloves, safety goggles.
- Materials: New sash cords (appropriate length and thickness), beading (if needed), pulleys (if damaged), wood filler (for sash repairs).
Ensure your workspace is clear, and consider wearing dust sheets to protect surrounding areas, especially if working on multi-story windows.
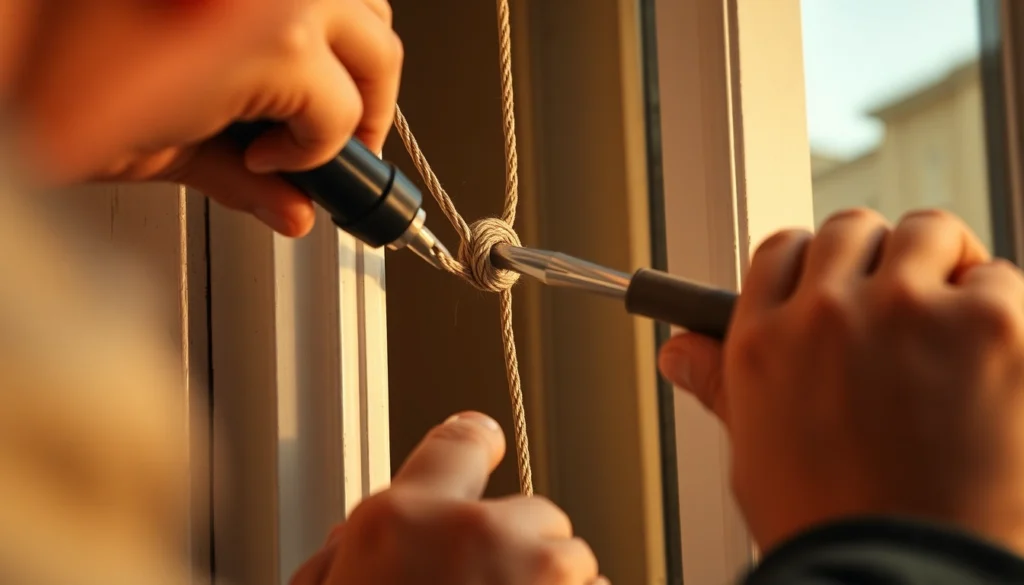
Removing the Old Sash Cord Safely
Step 1: Remove the Window Beading
Carefully prise off the beading surrounding the sash using a chisel or flat screwdriver. Take care not to damage or split the timber. Keep all screws and fittings for reinstallation.
Step 2: Detach the Sash
Lift or tilt the sash outward from the window frame, depending on the type of window. Support the sash to avoid dropping it unexpectedly.
Step 3: Release the Old Cord
Locate the pulley and disconnect the cord from the sash or weight. Usually, the cord is threaded over the pulley and secured at both ends. Cut the damaged cord carefully, noting its length for the replacement.
Installing a New Sash Cord Correctly
Step 1: Measure and Cut
Measure the length of the old cord while taut, and add an extra 2 inches as a buffer. Cut the new cord accordingly, choosing a durable material such as nylon or wire for longevity.
Step 2: Thread the New Cord
Thread the cord over the pulley, then tie or secure the ends to the sash or weights. Ensure the cord moves smoothly within the pulley and that the sash balances correctly.
Step 3: Reassemble and Test
Once installed, reattach the sash to the frame and test its operation multiple times. Adjust the cord length if necessary to achieve smooth operation and proper balance.
Step 4: Restore Beading
Replace the beading securely, ensuring it encloses the sash adequately and maintains the window’s historic or aesthetic appearance.
Choosing the Right Sash Cord for Your Windows
Types of Sash Cords and Materials
Sash cords have evolved from traditional cotton or hemp ropes to modern synthetic materials that offer greater strength and durability. When selecting a replacement, consider:
- Natural Fibers: Cotton, hemp, or jute—traditional but less resistant to weather and rot.
- Synthetic Materials: Nylon, polypropylene, or braided steel wire—more durable, resistant to environmental factors, and ideal for long-term use.
- Wire Cords: Often used in heavy or large sash windows, offering superior strength but requiring specialized fittings.
Matching Length and Thickness
Accurate measurement of the old cord’s length and thickness is essential. If the cord is lost or damaged beyond measurement, check manufacturer specifications or consult a professional. Thicker cords are suitable for heavier sashes, while lighter cords suffice for smaller windows.
Where to Source Quality Replacement Cords
Reputable suppliers include hardware stores, sash window specialist companies, and online retailers specializing in window parts. Always select high-quality, UV-resistant cords rated for your specific window weight and usage. Some recommended sources include:
- Specialist sash window suppliers
- Large DIY retailers like B&Q or Wickes
- Online platforms with verified reviews
Cost and Time Estimates for Sash Cord Repairs
DIY Costs and Material Savings
As previously noted, sourcing materials independently can cost as little as £10–£50, depending on the quality and quantity. For instance, a roll of durable braided nylon cord typically costs between £5–£15, and a few basic tools may be already available in your toolkit. DIY repairs usually take 1–3 hours, depending on experience and window complexity.
Professional Service Fees in the UK
Professional sash cord replacement services generally range from £70 to £150 per window, including labor and materials. The variation depends on factors such as window size, accessibility, and whether additional repairs are necessary. For multiple windows or historic properties requiring delicate restoration, costs may be higher.
Factors Affecting Repair Duration
- Number of sashes and windows involved
- Condition of the sash, frame, and pulleys
- Accessibility of the window location
- Experience of the technician
Complex cases involving rot repair or sash rebirths can extend repair time to multiple hours or days.
Maintenance Tips to Prevent Future Sash Cord Failures
Regular Inspection and Cleaning
Periodically examine your sash cords for signs of wear, fraying, or slack. Dust and grime can accumulate around pulleys and tracks, impeding smooth operation. Regular cleaning with a soft brush and gentle lubricants (like silicone spray) can prolong component life.
Proper Operating Techniques
Operate sash windows gently—avoid forcing open or closed. Use the crank or handles carefully, and prevent over-tightening or forcing the sash beyond its limits. This reduces undue stress on the cords and pulleys.
Periodic Replacement and Upgrades
Consider replacing sash cords proactively every 10-15 years, especially if your windows are frequently used. Upgrading to modern, durable materials like braided nylon can improve longevity. For historic or delicate sash windows, professional consultation can help preserve aesthetics and function.