Expert Guide on Broken Sash Cord Replacement: Step-by-Step Instructions and Tips
Understanding Sash Windows
Sash windows are a classic feature in many UK homes, prized for their historical significance and stylish appearance. They operate using a system of cords and weights that allow the windows to slide open and closed vertically. However, like all mechanical systems, sash windows can wear out over time, leading to issues such as broken sash cords. Understanding the fundamentals of sash windows, why these cords break, and how to identify these issues is essential for homeowners who wish to maintain their windows.
What Are Sash Windows?
Sash windows are typically made of framed glass panes, with the panes separated by wooden or metal bars known as muntins. The defining feature of sash windows is the sliding mechanism that allows them to open vertically. Unlike casement windows, which hinge outward, sash windows have one or more movable frames, or sashes, that glide over one another in a vertical track. This design not only provides efficient ventilation but also enhances the aesthetic appeal of a property.
Historically, sash windows were made from timber, giving them a traditional charm. However, modern versions may be made from materials such as PVC and aluminum. Nonetheless, a significant number of homeowners still prefer the elegance and character of wooden sash windows.
Why Sash Cords Break
Sash cords have a pivotal role in the operation of sash windows, connecting the weights that help balance the window sashes. Several factors can contribute to the breaking of these cords:
- Age and Wear: Over time, the materials used in sash cords can degrade, especially in older windows where the cords may have been installed many years ago.
- Environmental Factors: Exposure to humidity, temperature fluctuations, and sunlight can weaken the cords, causing them to fray or snap.
- Improper Maintenance: Neglecting regular maintenance, such as cleaning and lubricating the window tracks, can lead to excess friction and strain on the cords.
- Overloading: Adding decorative elements or secondary glazing, which are heavier than the original design anticipated, can strain the sash cords beyond their limits.
Signs That Indicate a Broken Sash Cord
Identifying a broken sash cord early can save homeowners significant costs associated with window damage or replacement. Common signs of a broken sash cord include:
- The window will not stay open and falls back down when released.
- Visible fraying, snapping, or absence of the sash cord.
- The window operates considerably slower or with difficulty, indicating increased friction.
- Uneven gaps around the window frame, suggesting misalignment due to weight issues.
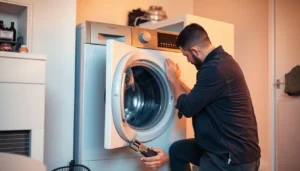
Preparation for Broken Sash Cord Replacement
Once you’ve established that your sash cord is broken, the next step is to prepare for its replacement. This involves gathering tools, safety equipment, and removing the sash window for access.
Tools You Will Need
Proper tools make the replacement process much smoother. Ensure you have the following ready:
- A flathead screwdriver: For removing beading and securing elements.
- A chisel: For prying open tight areas around the window frame.
- A hammer: To drive in pins or nails as needed.
- New sash cord: Make sure it’s the appropriate thickness and length for your windows.
- Measuring tape: To measure the length of the cords accurately.
- A utility knife: For cutting the cord to the required length.
- Safety goggles and gloves: To protect yourself during the process.
Safety Procedures to Follow
Replacing sash cords can expose you to risks, especially with heavy window sashes. Here are essential safety tips to keep in mind:
- Ensure that the work area is clear of excess clutter to avoid tripping.
- Use ladders carefully and ensure they’re stable when needing to reach higher windows.
- Wear safety goggles and gloves to protect against any falling parts or sharp edges.
- Do not attempt this project alone if the sashes are particularly heavy; having a second person can provide necessary assistance.
Removing the Sash Window
Before you can replace the broken sash cord, you need to take the window sashes out of their frame. Follow these steps:
- Begin by removing any molding or beading around the window that holds the sashes in place, using a flathead screwdriver.
- If the window has weights attached, carefully cut any existing cords to allow the window sash to be released.
- Gently slide the sashes upward and out of their tracks, taking note of how they are assembled for reinstallation.
Step-by-Step Process of Broken Sash Cord Replacement
With the sash window removed and ready for repair, you can now proceed to replace the broken sash cord efficiently.
Removing the Old Cord
To replace the broken sash cord:
- Inspect the old cord and take note of its length. It is beneficial to use this measurement to ensure the new cord is cut to the correct size.
- Carefully cut the old cord and remove it completely from the pulley and weight system.
Housing the New Sash Cord
Now, it’s time to install the new cord:
- Cut a new length of sash cord, making sure it is approximately two inches longer than the measurement you took from the old cord.
- Thread the new cord onto the pulley system located at the top of the window frame, ensuring it moves freely.
- Attach the cord to the window sash. Make sure to tie a sturdy knot to ensure it won’t slip or come loose.
- If using weights, securely attach the weight to the cord and test to ensure everything functions properly before sealing the system.
Reinstalling the Sash Window
After the new cords are in place, follow these steps to reinstall the sash window:
- Align the sashes within the window frame, ensuring that they slide smoothly in their respective tracks.
- Replace any beading or molding that you had removed, securing it in place with nails.
- Test the operation of the windows to confirm that they open and close properly and hold their position when opened.
Cost Considerations for Sash Cord Replacement
Understanding the costs associated with broken sash cord replacement is crucial for homeowners. Costs can vary based on several factors.
Average Costs in the UK
The cost to replace a broken sash cord in the UK ranges widely based on various factors. Here is a general overview:
- £70 for replacing one outer sash window cord.
- £95 for both inner sash cords.
- £115 for both outer cords.
- £150 for replacing all four sash cords.
Keep in mind that these costs can fluctuate based on the materials used and labor rates in your area.
DIY vs. Professional Services
Deciding between a DIY approach and hiring professional services depends largely on your skill level and comfort with home repairs. DIY can be significantly more affordable, but improper installation can lead to further issues down the line. On the other hand, hiring a professional may cost more upfront but ensures that the job is done correctly, potentially saving you from costly future repairs.
Factors That Affect Replacement Costs
Several factors can influence the cost of sash cord replacement:
- Material Quality: Higher-quality cords made of durable materials may cost more but could last longer.
- Window Size and Type: Larger or non-standard window sizes might require more materials or specialized tools.
- Geographical Location: Labor costs can vary depending on your location within the UK, with urban areas generally being more expensive.
- Additional Repairs: If there are other underlying issues with the sashes or window frame, these may require additional costs.
Maintenance Tips for Sash Windows
Having stylish sash windows in your home is one thing, but maintaining them is crucial to ensure they last for years to come. Proper maintenance practices can prevent the need for frequent repairs.
Regular Maintenance Practices
Regular inspections and preventive maintenance can keep your sash windows functioning optimally:
- Clean the Tracks: Regularly remove any dust or debris that may accumulate in the window tracks.
- Lubricate Pulleys: Use appropriate lubricants to ensure pulleys and weights operate smoothly.
- Inspect for Damage: Periodically check for rot or damage in the sashes and frames, and address any issues promptly.
- Paint and Seal: Keeping the wood sealed and painted can protect against moisture damage, especially in older sash windows.
How to Extend the Life of Your Sash Cords
To ensure that your new sash cords last as long as possible, consider the following precautions:
- Choose high-quality sash cords that are resistant to wear and fraying.
- Limit the weight on the window sashes to prevent cord strain.
- Implement regular inspection schedules, particularly after extreme weather conditions.
- Keep window systems in alignment to reduce wear on the cords.
When to Call a Professional
There are instances where it is advisable to call a professional for sash cord replacement:
- If you lack the tools or competence required for a safe repair.
- When the window frames display signs of serious structural damage.
- If you are unsure about the installation procedure and don’t want to risk complications.
- When multiple windows have similar issues and a professional can offer a more comprehensive service.
Replacing broken sash cords is a manageable task for those with some DIY capability. By understanding the structure and function of your sash windows, preparing adequately, and knowing when to seek professional help, you can maintain these beautiful features of your home effectively. Remember, whether it’s a simple repair or a complex replacement, your sash windows deserve proper care and attention to keep them operating smoothly for years to come.
For further assistance, you can refer to our detailed Broken sash cord replacement services, ensuring the longevity and functionality of your sash windows.